
Macrium Reflect Rescue USB Guide
Clone Windows to a New Drive from Bootable Rescue Media
This guide explains how to create a Macrium Reflect Rescue USB, start the computer from it, and clone a healthy Windows system drive to a compatible SSD, NVMe drive, or replacement hard drive.
Running Macrium outside the installed Windows environment provides a controlled workspace for copying the complete system disk. It does not guarantee that every clone will boot, so the preparation and verification steps are just as important as the copy itself.
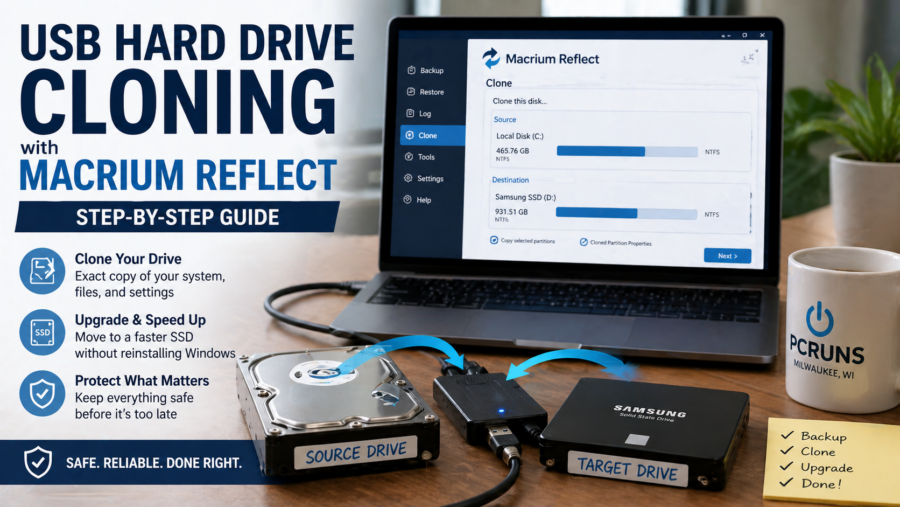
The Most Important Rule
The source is the old drive containing Windows and your files. The destination is the new drive that Macrium will overwrite. Identify both by model and capacity. Do not rely on drive letters because they can change in the Rescue environment.
Keep the original drive unchanged until the replacement starts successfully and you have checked Windows, your programs, and your important files.
What This Method Does
Macrium Reflect Rescue Media starts a separate Windows recovery environment from a USB flash drive. From there, Macrium can copy the partitions from the original system disk to another drive while the installed copy of Windows is not running.
Copies the System Disk
A complete clone can include Windows, programs, settings, personal files, and the smaller partitions required for startup and recovery.
Runs Outside Windows
Windows Update, open applications, and ordinary background activity are not changing the source while the Rescue environment performs the copy.
Supports Drive Upgrades
The method can be used for an HDD-to-SSD upgrade or migration to a compatible SATA or NVMe replacement.
Provides Recovery Tools
Rescue Media can also provide Macrium’s startup-repair tools when a completed clone does not boot as expected.
When This Is a Good DIY Method
- Windows is reasonably stable and the source drive reads normally.
- You want to preserve installed programs, user accounts, settings, and files.
- The new drive is compatible with the computer.
- The required partitions and used data will fit on the destination.
- You can confidently distinguish the source drive from the destination.
- You are prepared to retain the original until the replacement has been tested.
If the source clicks, disappears, produces read errors, or causes repeated freezes, an ordinary clone may not be the safest first step. Review Recovering Data from a Failing Hard Drive before continuing.
What You Will Need
- A working Windows computer: Use it to install Macrium Reflect and build the Rescue Media.
- Macrium Reflect: Macrium currently offers Reflect X as a licensed product with a time-limited trial. Check current eligibility and terms before beginning.
- A USB flash drive: Its contents may be replaced while the Rescue Media is created.
- A compatible destination: A SATA SSD, NVMe SSD, or hard drive appropriate for the computer.
- A connection method: An internal slot, USB-to-SATA adapter, drive dock, or compatible NVMe enclosure.
- Reliable power: Connect a laptop charger and do not interrupt the clone.
- Encryption recovery information: Save the BitLocker or device-encryption recovery key before changing storage or startup configuration.
- A separate backup: Preserve irreplaceable files independently whenever the source drive is healthy enough to do so.
Before You Start
- Check the source drive. Investigate disk warnings, unusual sounds, slow reads, freezes, or disappearing storage.
- Confirm capacity. All required partitions and used data must fit within the destination’s usable space.
- Confirm compatibility. SATA, M.2 SATA, and M.2 NVMe are different interfaces even when two drives appear similar.
- Save the recovery key. Verify BitLocker or device-encryption status before making startup or storage changes.
- Record the boot configuration. Note whether the computer uses UEFI or Legacy/CSM mode and whether Secure Boot is enabled.
- Identify both physical drives. Write down each model and capacity.
- Back up important files. A clone is a migration copy, not a replacement for an independent backup.
The Macrium USB Cloning Process
Build
Create and test Macrium Reflect Rescue Media on a USB flash drive.
Connect
Attach the destination drive and identify both disks carefully.
Clone
Copy all required partitions and choose the correct destination layout.
Verify
Start from the replacement and check Windows, programs, files, and capacity.
Step 1: Install Macrium Reflect
Install the current Macrium Reflect product on a working Windows computer. If you are using a trial, confirm that its current terms include the tools required for your intended clone and Rescue Media.
Open Reflect and allow any required components or updates to finish before building the USB. Macrium’s menus and wording can change between releases, so follow the labels displayed by your installed version.
Step 2: Create the Rescue USB
- Insert the USB flash drive.
- Open Macrium Reflect.
- Open Other Tasks and select Create Rescue Media, or use the equivalent Rescue Media command in your version.
- Select the supported Windows recovery environment recommended by Macrium for the computer.
- Choose the correct USB device as the build destination.
- Review any warnings concerning the USB’s existing contents.
- Select Build and wait for Macrium to report completion.
Do not assume the media works merely because it was created. Test that it starts on the computer before depending on it for the cloning job.
Step 3: Test the Rescue USB
- Leave the USB connected and restart the computer.
- Open the manufacturer’s temporary boot menu.
- Select the UEFI entry for the USB when the Windows installation and computer use UEFI.
- Wait for the Macrium Rescue environment to load.
- Confirm that Macrium can see the original system disk and the storage controller.
See the Boot Menu Keys guide for common HP, Dell, Lenovo, ASUS, Acer, and other shortcuts.
If the Rescue USB Does Not Appear
First try another USB port, recreate the media, and confirm that USB booting is enabled. Use the UEFI-labeled USB entry when appropriate. Current Macrium Rescue Media is designed to support modern startup environments, so do not disable Secure Boot automatically.
Change Secure Boot or Legacy/CSM settings only when you understand why the media is not starting and how to restore the original configuration. Record every firmware change before making it.
Step 4: Connect the Destination Drive
Shut the computer down and connect the replacement drive using a compatible internal slot, adapter, dock, or enclosure. Then start the Macrium Rescue USB again.
Confirm the model and capacity of the original and destination drives. The Rescue environment may assign different letters than Windows, but the physical models and capacities remain useful identifiers.
Step 5: Select the Source and Destination
- Locate the original Windows system disk.
- Select Clone this disk, or the equivalent cloning command.
- Choose the new SSD, NVMe drive, or hard drive as the destination.
- If the destination contains old partitions that you are certain can be erased, remove them within the proposed destination layout.
- Copy or drag every required source partition to the destination.
The Windows partition is not always enough by itself. EFI, Microsoft Reserved, recovery, or system partitions may also be required. When in doubt, preserve the complete system-disk layout rather than copying only the visible C: partition.
Pause here: If you cannot confidently identify the original and replacement drives, cancel the operation before anything is overwritten.
Step 6: Adjust the Partition Layout
Larger Destination
Expand the Windows partition or use Macrium’s layout controls so the additional space does not remain unnecessarily unallocated.
Smaller Destination
The used data and required partitions must fit. Reduce the proposed Windows partition appropriately without shrinking required system partitions carelessly.
SSD Destination
Retain appropriate partition alignment. Macrium normally handles alignment, but review the proposed result before running the clone.
GPT and MBR
Keep the partition style compatible with the computer’s intended UEFI or Legacy/CSM startup mode unless you are deliberately performing a supported conversion.
Step 7: Review and Run the Clone
Before selecting Finish, Run, or the equivalent command, verify:
- The source is the original drive containing the working Windows installation.
- The destination is the replacement drive that can be overwritten.
- All required startup and recovery partitions are included.
- The proposed Windows partition has an appropriate size.
- The destination layout is compatible with the intended startup mode.
Start the operation and do not disconnect either drive, remove power, or force the computer to restart. Cloning can take from minutes to hours depending on the data quantity, drive condition, connection speed, and destination.
Step 8: Install and Start from the New Drive
- When Macrium reports completion, shut the computer down fully.
- Remove the Rescue USB.
- Install the replacement internally if it was connected externally.
- Disconnect the original for the first test when doing so is safe and practical. This prevents confusion about which Windows installation starts.
- Turn the computer on and select the new drive from the boot menu if necessary.
- Allow Windows to detect the storage change and restart if requested.
Do not erase the original drive after the first successful startup. Keep it unchanged until you have completed the checks below.
Step 9: Verify the Clone
- Restart the computer more than once and confirm reliable startup.
- Verify in Disk Management that Windows is running from the replacement drive.
- Open important programs, documents, photographs, and other files.
- Check Windows activation, Windows Update, and Device Manager.
- Confirm that the full expected capacity is available.
- Check BitLocker or device-encryption status and retain the recovery key.
- Confirm that your separate backup remains available.
If the Cloned Drive Will Not Boot
Keep the original intact. Check the selected boot device, UEFI or Legacy/CSM mode, GPT or MBR layout, Secure Boot status, and whether every required system partition was copied.
You can restart the Rescue USB and use Macrium’s Fix Windows Boot Problems tool when it is available and appropriate. For a structured diagnosis, follow the Cloned Drive Won’t Boot guide.
When to Stop the DIY Process
Stop if the source drive begins clicking, disappears, produces repeated read errors, or becomes dramatically slower. Also stop if the correct destination cannot be identified, Macrium does not detect the storage controller, required partitions are unclear, or the encryption recovery key is unavailable.
Repeated ordinary cloning attempts can place additional stress on a failing source. If the files matter more than preserving the exact Windows installation, recovery should take priority.
Macrium Reflect Cloning Questions
Is Macrium Reflect still free?
Macrium’s current consumer offering is Reflect X Home, which is licensed software with a time-limited trial. Older permanent free editions may still exist on some computers, but they should not be presented as the current supported download. Check Macrium’s current product and trial terms.
Why use Rescue Media instead of cloning inside Windows?
Rescue Media runs outside the installed Windows environment, so ordinary applications and updates are not changing the system during the copy. Both approaches can work; the result still depends on drive health, correct selections, and a compatible boot layout.
Do I have to disable Secure Boot?
Not automatically. Use properly created current Rescue Media and try the normal UEFI boot path first. Change Secure Boot only when necessary for a diagnosed reason, and record the original setting.
Can Macrium clone a larger hard drive to a smaller SSD?
It may be possible when the used data and all required partitions fit within the smaller destination. Review and adjust the proposed layout carefully before starting.
Can I connect the new SSD through USB?
Yes, when you use a compatible adapter, dock, or enclosure. After cloning, install the drive through the computer’s intended internal interface before testing normal startup.
Is the old drive now my backup?
It can provide a temporary fallback while it remains unchanged, but it is not a complete ongoing backup plan. It becomes outdated and can also be lost, damaged, or erased.
Related PCRuns Guides
Drive Cloning Overview
Review when to clone—and when another approach is safer—in the Hard Drive Cloning Guide.
AOMEI Partition Assistant
Compare this workflow with the AOMEI Partition Assistant cloning guide.
Cloned Drive Will Not Boot
Diagnose startup trouble with the cloned-drive troubleshooting guide.
Boot Menu Keys
Find common manufacturer shortcuts in the USB Boot Menu Keys guide.
Macrium’s products, licensing, interface, and Rescue Media options can change. Consult the official Macrium Reflect website and the documentation supplied with your installed version before starting.
Would You Rather Have the Drive Evaluated First?
I’m John Zettel, the owner and technician at PCRuns. I can check the source drive, confirm replacement-drive compatibility, and explain whether cloning, recovery, repair, or a clean Windows installation makes the most sense before you authorize paid work.
Service is available by appointment for Milwaukee-area homeowners and small businesses. Local pickup or a convenient public meeting location may be arranged. Please include the charger or power adapter with a laptop.