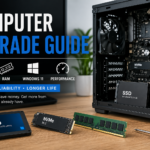
If your computer is slowing down, freezing, or you’re trying to upgrade to a faster drive without losing everything, cloning your hard drive can save you hours of setup and frustration.
This is one of the methods I’ve used locally here in Milwaukee—especially when upgrading systems from older mechanical hard drives to SSDs or NVMe drives. It works well, but there are a few important things to understand upfront to avoid problems.
If you’re new to cloning or want to compare all available methods, start with the hard drive cloning guide, which explains when cloning makes sense and which tools to use.
Quick Summary
- Best for upgrading HDDs to SSD or NVMe drives
- Works especially well when cloning within the same computer
- AOMEI Professional allows bootable USB cloning
- Ideal for Windows 10 to Windows 11 upgrade workflows
- Safer and faster than reinstalling everything manually
What This Method Does (In Plain Terms)
Using AOMEI Partition Assistant allows you to create an exact copy of your current system, including:
- Windows operating system
- Programs and applications
- Files and user data
- System settings
This means you can move from a slow hard drive to a fast SSD or NVMe drive without reinstalling everything.
AOMEI is especially useful when:
- Cloning from a larger drive to a smaller one
- Moving between different types of drives (HDD → SSD → NVMe)
- Adjusting partitions during the cloning process
Free vs Paid (What You Should Expect)
This is an important distinction that most guides skip.
Free Tools (General)
Many free cloning tools:
- Have limited features
- Offer less control over partition sizing
- Require more manual setup
- May increase the chance of boot issues
Paid Version (What I Use)
With the Professional version of AOMEI Partition Assistant:
- You can create a bootable USB cloning environment
- You get better support for resizing drives
- Cloning is more consistent across different hardware setups
👉 In real-world jobs, this saves time and avoids troubleshooting later.
About Macrium Reflect
- Very reliable for straightforward clones
- Offers a free or trial version
- Typically simpler to use for basic upgrades
👉 In practice:
- Macrium Reflect = best for simple, same-drive upgrades1
- AOMEI = better when flexibility is needed
What You’ll Need
Before starting:
- AOMEI Partition Assistant (Professional recommended)
- USB stick (8GB or larger)
- Target SSD or NVMe drive
- USB-to-SATA adapter or NVMe enclosure
- Power connected (especially for laptops)
A quick check here can prevent having to redo the process later.
How Long Does This Take?
Most clones take:
- 20–60 minutes for the cloning process (longer if older tech)
- Additional time for Windows 11 upgrades and updates
Older mechanical drives may take longer depending on their condition.
Before You Start
Even successful clones can occasionally fail to boot if partitions or boot settings are incorrect. Always keep the original drive untouched until the new system has been fully tested.
Coming soon is a cloned drive won’t boot troubleshooting guide.
Step 1: Create the Bootable USB (AOMEI)
- Open AOMEI Partition Assistant
- Go to:
- Tools → Make Bootable Media
- Insert your USB stick
- Follow the prompts
This creates a standalone cloning environment outside of Windows.
Step 2: Install and Connect the Target Drive
- Install the SSD or NVMe drive into the system (preferred)
- Or connect using an external adapter
Make sure the drive is detected before continuing.
Step 3: Boot from the USB0
Restart your system and enter the boot menu.
If you’re not sure how:
👉 See boot menu keys for HP, Dell, and Lenovo
Select your USB device to launch AOMEI.
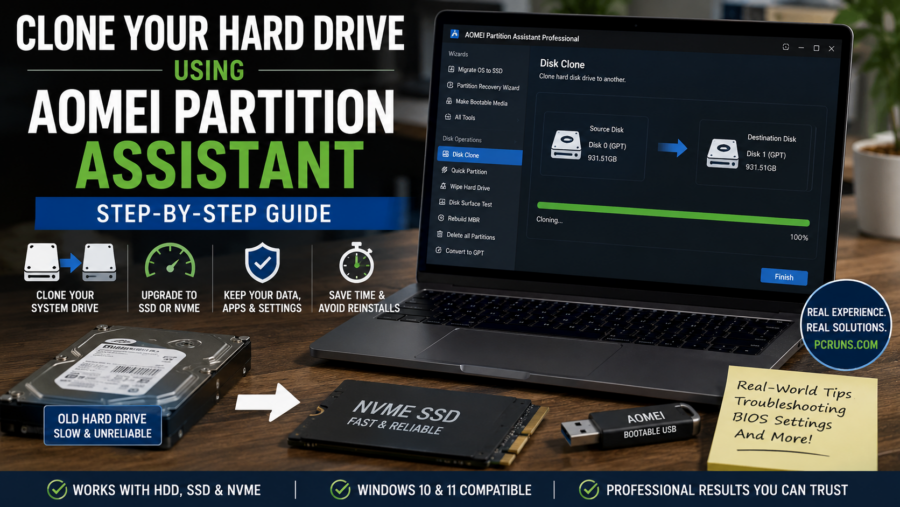
Step 4: Clone the Drive
Inside AOMEI:
- Select:
- Clone → Disk Clone
- Choose:
- Source drive (your current system)
- Choose:
- Target drive (new SSD or NVMe)
- Select:
- “Fit partitions to entire disk” or manually resize
- Start the cloning process
Real-World Approach (What Works Best in Practice)
In real-world jobs, especially when upgrading multiple computers, I’ve found that the most reliable method is to clone each system within the same machine rather than trying to move one cloned drive across different computers.
Here’s why:
- The system keeps its original hardware configuration
- No need to disable Secure Boot or adjust BIOS settings
- The cloned drive usually boots immediately without extra fixes
When I tested moving cloned drives between different systems, I ran into issues like:
- “BootDrive Not Found” errors
- Systems not recognizing the cloned drive
- Needing to disable security features just to get the system to start
Because of that, I now stick to a one-machine-at-a-time approach, which avoids those problems entirely.
Why This Method Is More Reliable
Cloning within the same computer ensures:
- Bootloader stays aligned with the system
- BIOS recognizes the drive correctly
- Windows adapts smoothly to the upgraded hardware
👉 In most cases, this means:
In many cases, this greatly reduces the need for troubleshooting after the clone.
My Upgrade Workflow (Step-by-Step)
This is the process I use when upgrading systems:
- Install the new SSD or NVMe drive directly into the computer
- Clone from the existing hard drive to the new drive
- Boot from the new drive immediately
- Upgrade to Windows 11 (now fast on SSD/NVMe)
- Keep the original hard drive temporarily as a backup
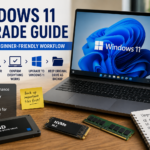
Why Upgrade After Cloning (Not Before)
Upgrading Windows 10 to Windows 11 on a mechanical drive is extremely slow.
By cloning first and upgrading after moving to SSD/NVMe:
- The upgrade process is significantly faster
- The system runs more smoothly during upgrade
- Total job time is reduced
Using the Old Drive (Smart Option)
After confirming the clone works:
- Keep the old drive installed temporarily
- Use it as a fallback if needed
Later, you can:
- Wipe it and use it for storage
- Link Windows folders (Documents, Desktop, Downloads)
- Remove it entirely if the user prefers
Real-World Scenario (Important)
I cloned a 512GB SSD to a 240GB SSD.
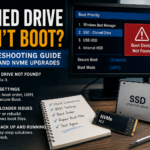
The clone completed successfully—but the system would not boot and showed:
👉 “BootDrive Not Found”
Why This Happens
When cloning from a larger drive to a smaller one:
- Boot partitions may not scale correctly
- The EFI partition may not transfer properly
- Bootloader configuration may break
Even though the data is copied, the system may not recognize it as bootable.
How to Fix It
Option 1: Repair Bootloader
Boot from a Windows USB and run:
- Startup Repair
- Or rebuild boot files manually
Option 2: Re-clone Carefully
- Ensure all partitions are selected
- Pay attention to EFI partition
- Avoid aggressive resizing
Option 3: Fresh Install (Fallback)
- Install Windows on the new drive
- Copy files manually
BIOS / Security Settings to Watch
BitLocker
- Suspend or decrypt before cloning
Secure Boot
- May need to be temporarily disabled in some cases
Boot Mode
- Keep consistent (UEFI vs Legacy)
When AOMEI Is the Better Choice
Use this method when:
- Cloning to a smaller drive
- Working with NVMe upgrades
- You need partition control
- You want a USB-based cloning environment
When It Might Not Be
Avoid cloning if:
- The system is unstable or corrupted
- Malware is present
- Hardware issues go beyond the drive
Real-World Use Around Milwaukee
This is a method I’ve used to:
- Upgrade business computers without downtime
- Improve speed for everyday users
- Extend the life of existing systems
With the right approach, these upgrades can easily add several years of usable life to a machine.
Related Guides
You may also find these helpful:
Need a Second Opinion?
If you’re not sure whether cloning is the right approach—or you want to avoid the risk of a failed upgrade—you can always schedule a free evaluation.
No pressure. Just a clear answer based on your system.